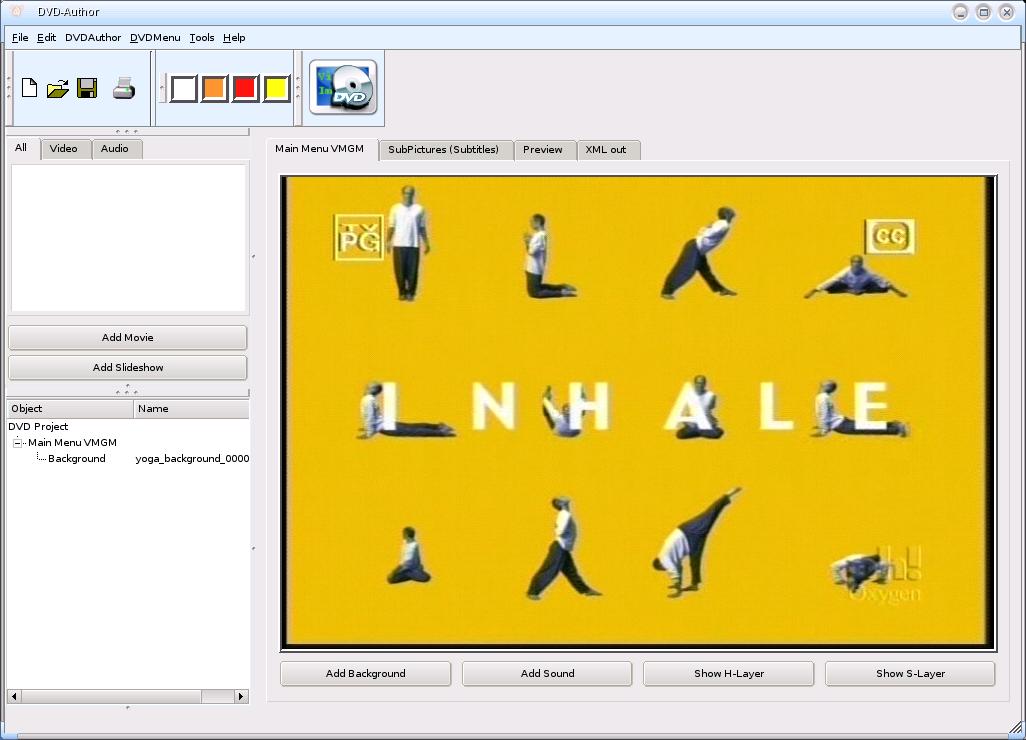
Use QDVDAuthor to generate the menus for your DVD. The first step is to configure a background. In my example, I used Kino above to save a still frame in JPEG format. Click the "Add Background" button, browse to the directory where the JPEG is saved, and select it. The saved image will appear in the tab named "Main Menu VMGM". If you use another image that is not exactly 720x480 resolution, it will prompt you to scale it to fit. Just click Yes and agree to everything. Look at the sample in Fig 8 to see a basic backgroun that has been loaded.
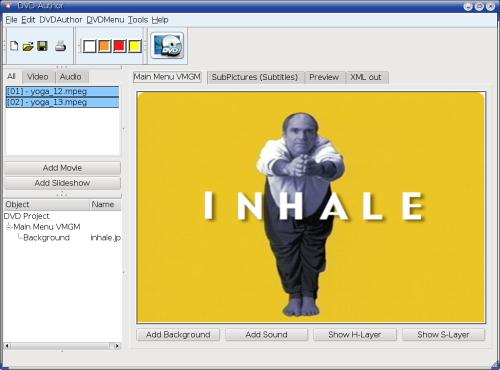
Now click the "Add Movie" button and select the MPEG file generated by the dv2mpg script. Repeat if you will be putting more than one MPEG per DVD. Make sure to not exceed the free space for a blank DVD, about 4.4 GB. In my example, I am putting two shows per DVD. Look at Fig 9 to see the two movies that are now available.
At this point you could also define chapters for each MPEG movie by right-clicking on each movie and going into the chapter editor. I have experienced problems with this myself. The discs that I burn with a single MPEG movie with or without chapters will play properly in my DVD player, a Sony 5.1 Stereo Surround 5 disc changer home entertainment system. When I burn discs with more than one MPEG and no chapters defined, it also plays properly. When I burn a disc with more than one MPEG and with chapters, the disc will not play in my DVD player. It doesn't even recognize it as a DVD disc. I am looking for a solution to this problem, chances are that my method is slightly flawed. Look for updates to this section.
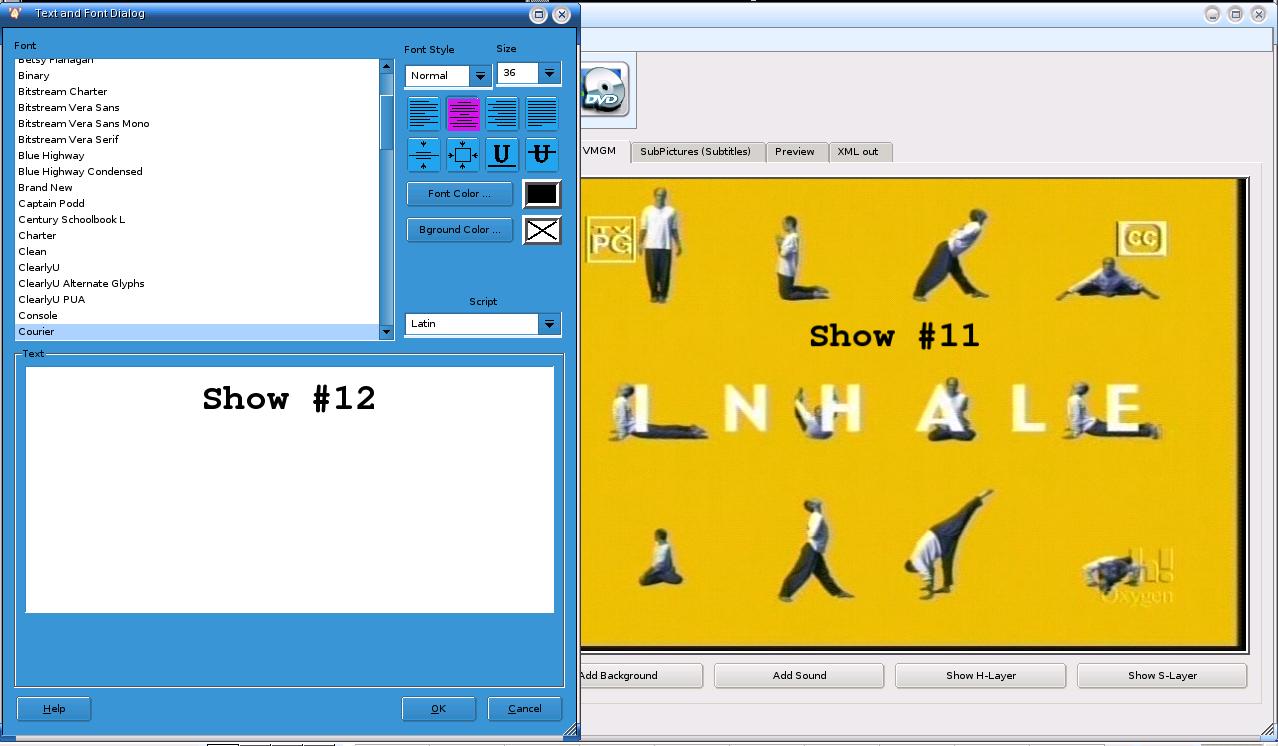
Next we're going to create a text label which will become a button. Right click on the background and select "Add Text". Click and drag to select the area you want the text to be. When you let go of the mouse button, it will bring up a text box dialog. Select the font, size, and alignment. Enter the text in the bottom box and press OK. Repeat for each MPEG, but of course a different location must be selected for each block of text. Look at the sample in Fig 10 to see what it looks like when adding a text label.
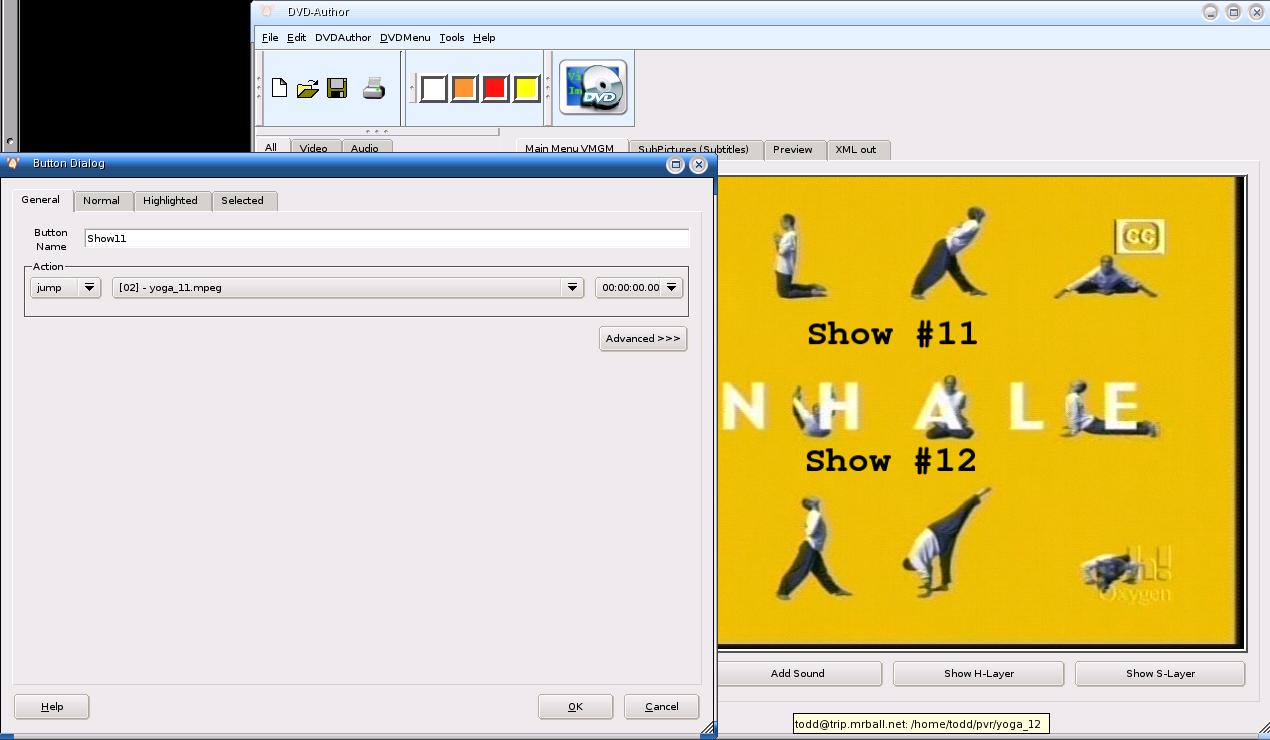
Next right click on the text label and select "Define as Button". Give it a name, any name will do. In my example, I used "Show11" and "Show12". Leave the action set to "Jump", set the target to one of the MPEG's that are available, and press OK. Look at the sample in Fig 11 to see configuring a button.
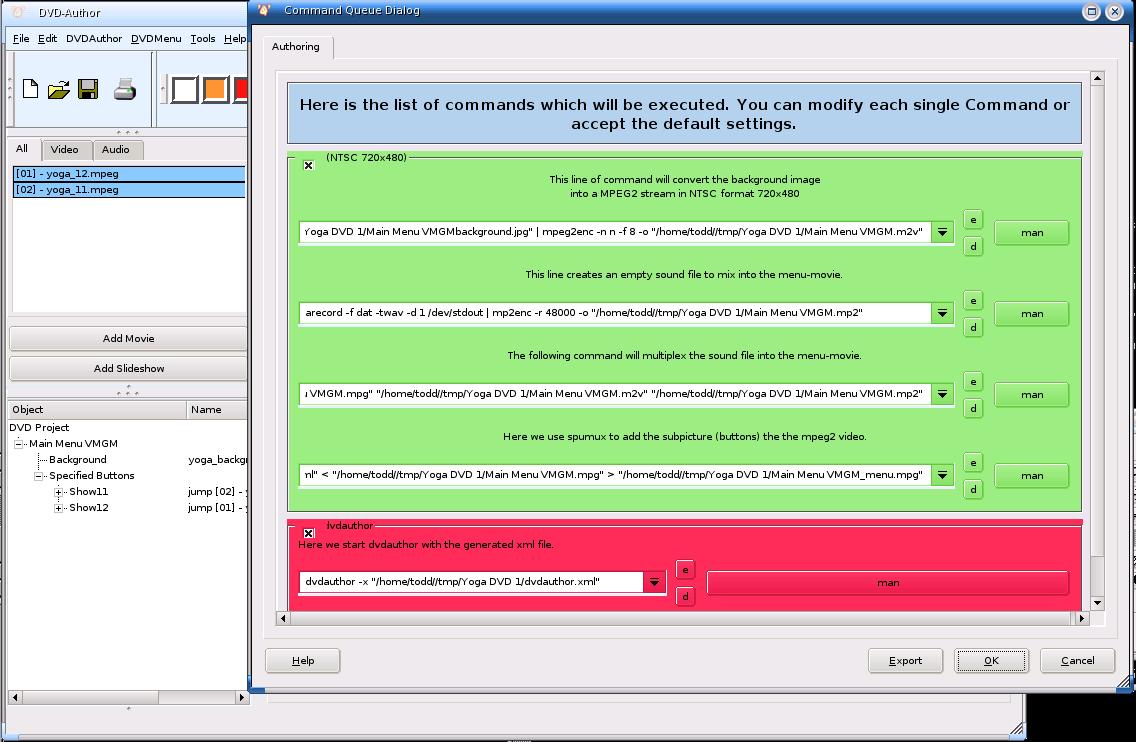
Repeat for each MPEG you have in your project. You could also set the color of the text when it's "selected" and when it's "activated". Feel free to experiment, but note that the defaults are very good selections. Next select Tools->Setup and set the Project Name. You can set this to whatever you want it to be. I use something very simple such as "Yoga DVD 1". Set the DVD directory to the final location that the DVD files and directory structure will be created. In my example I use /pvr/dvd1. Make sure this directory is on a partition large enough to hold the approximate 4.4 GB worth of files (though it's not necessary for the directory to exist yet). I also change the temporary directory. Select the Paths tab and change /tmp to a temporary directory on your system that is on a partition large enough to hold all of the temporary files. In my example, my /home partition is a large partition, so I set it to /home/todd/tmp. Press OK to accept the settings. At this point, save the config file. Click File->Save and create the directory you set in the DVD directory setting above. Then in that directory save the file with an xml extension. In my example, I named it /pvr/dvd1/yoga_11_12.xml. At this point, you click the Create DVD icon or select DVDAuthor->CreateDVD. A dialog box will appear which has all of the commands that it is about to run to create your DVD structure. Look at the sample in Fig 12 to see what the dialog will look like.
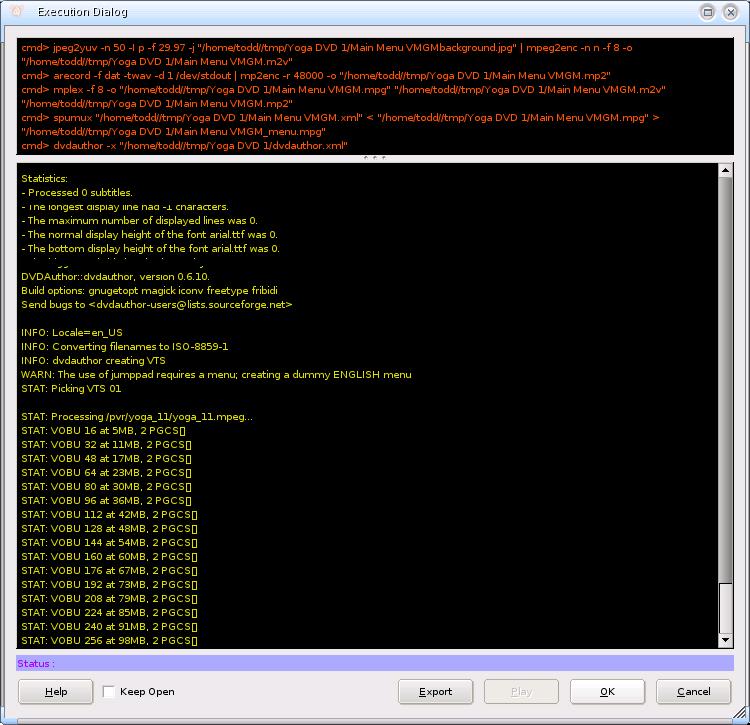
Click OK to begin. A status window will appear showing the individual parts of the DVD being assembled into the proper files and formats and locations. Look at the sample in Fig 13 to see sample output. When the processing finishes, it will automatically close the status window unless you check the "Keep Open" checkbox. Close QDVDAuthor when this step completes successfully.
Approximate time: 10 minutes to create menu
Approximate time: 15 minutes to create dvd
(Actual time is dependent upon CPU speed and disk throughput.)